

Setting Up Yadle » Scanning Files » Scan Files on Cloud Storage » Dropbox
Yadle integrates with cloud storage providers allowing users to scan their files stored in the cloud. Files kept on cloud storage are discovered by the Yadle agent and can be searched along with other locally kept files. Yadle is designed to provide a federated search of all of your files. Instead of digging through each potential location for a file, use Yadle to quickly identify where it lives and retrieve the source file to use.
Follow the steps outlined here to connect a Dropbox cloud storage account to Yadle and configure folders to be scanned.
1. Login to the Yadle web app using your own user credentials. If you do not yet have a user account, contact your Yadle administrator and request an invite.Note:
- Your Yadle account must have Admin privileges in order to be able to connect to cloud services.
2. Once logged in, click on Cloud Services under the Admin section of the left main menu. Any previously connected cloud services will appear on this page. If this is the first time visiting this page, no existing cloud services will be present. Proceed to the next step to add a cloud storage device.
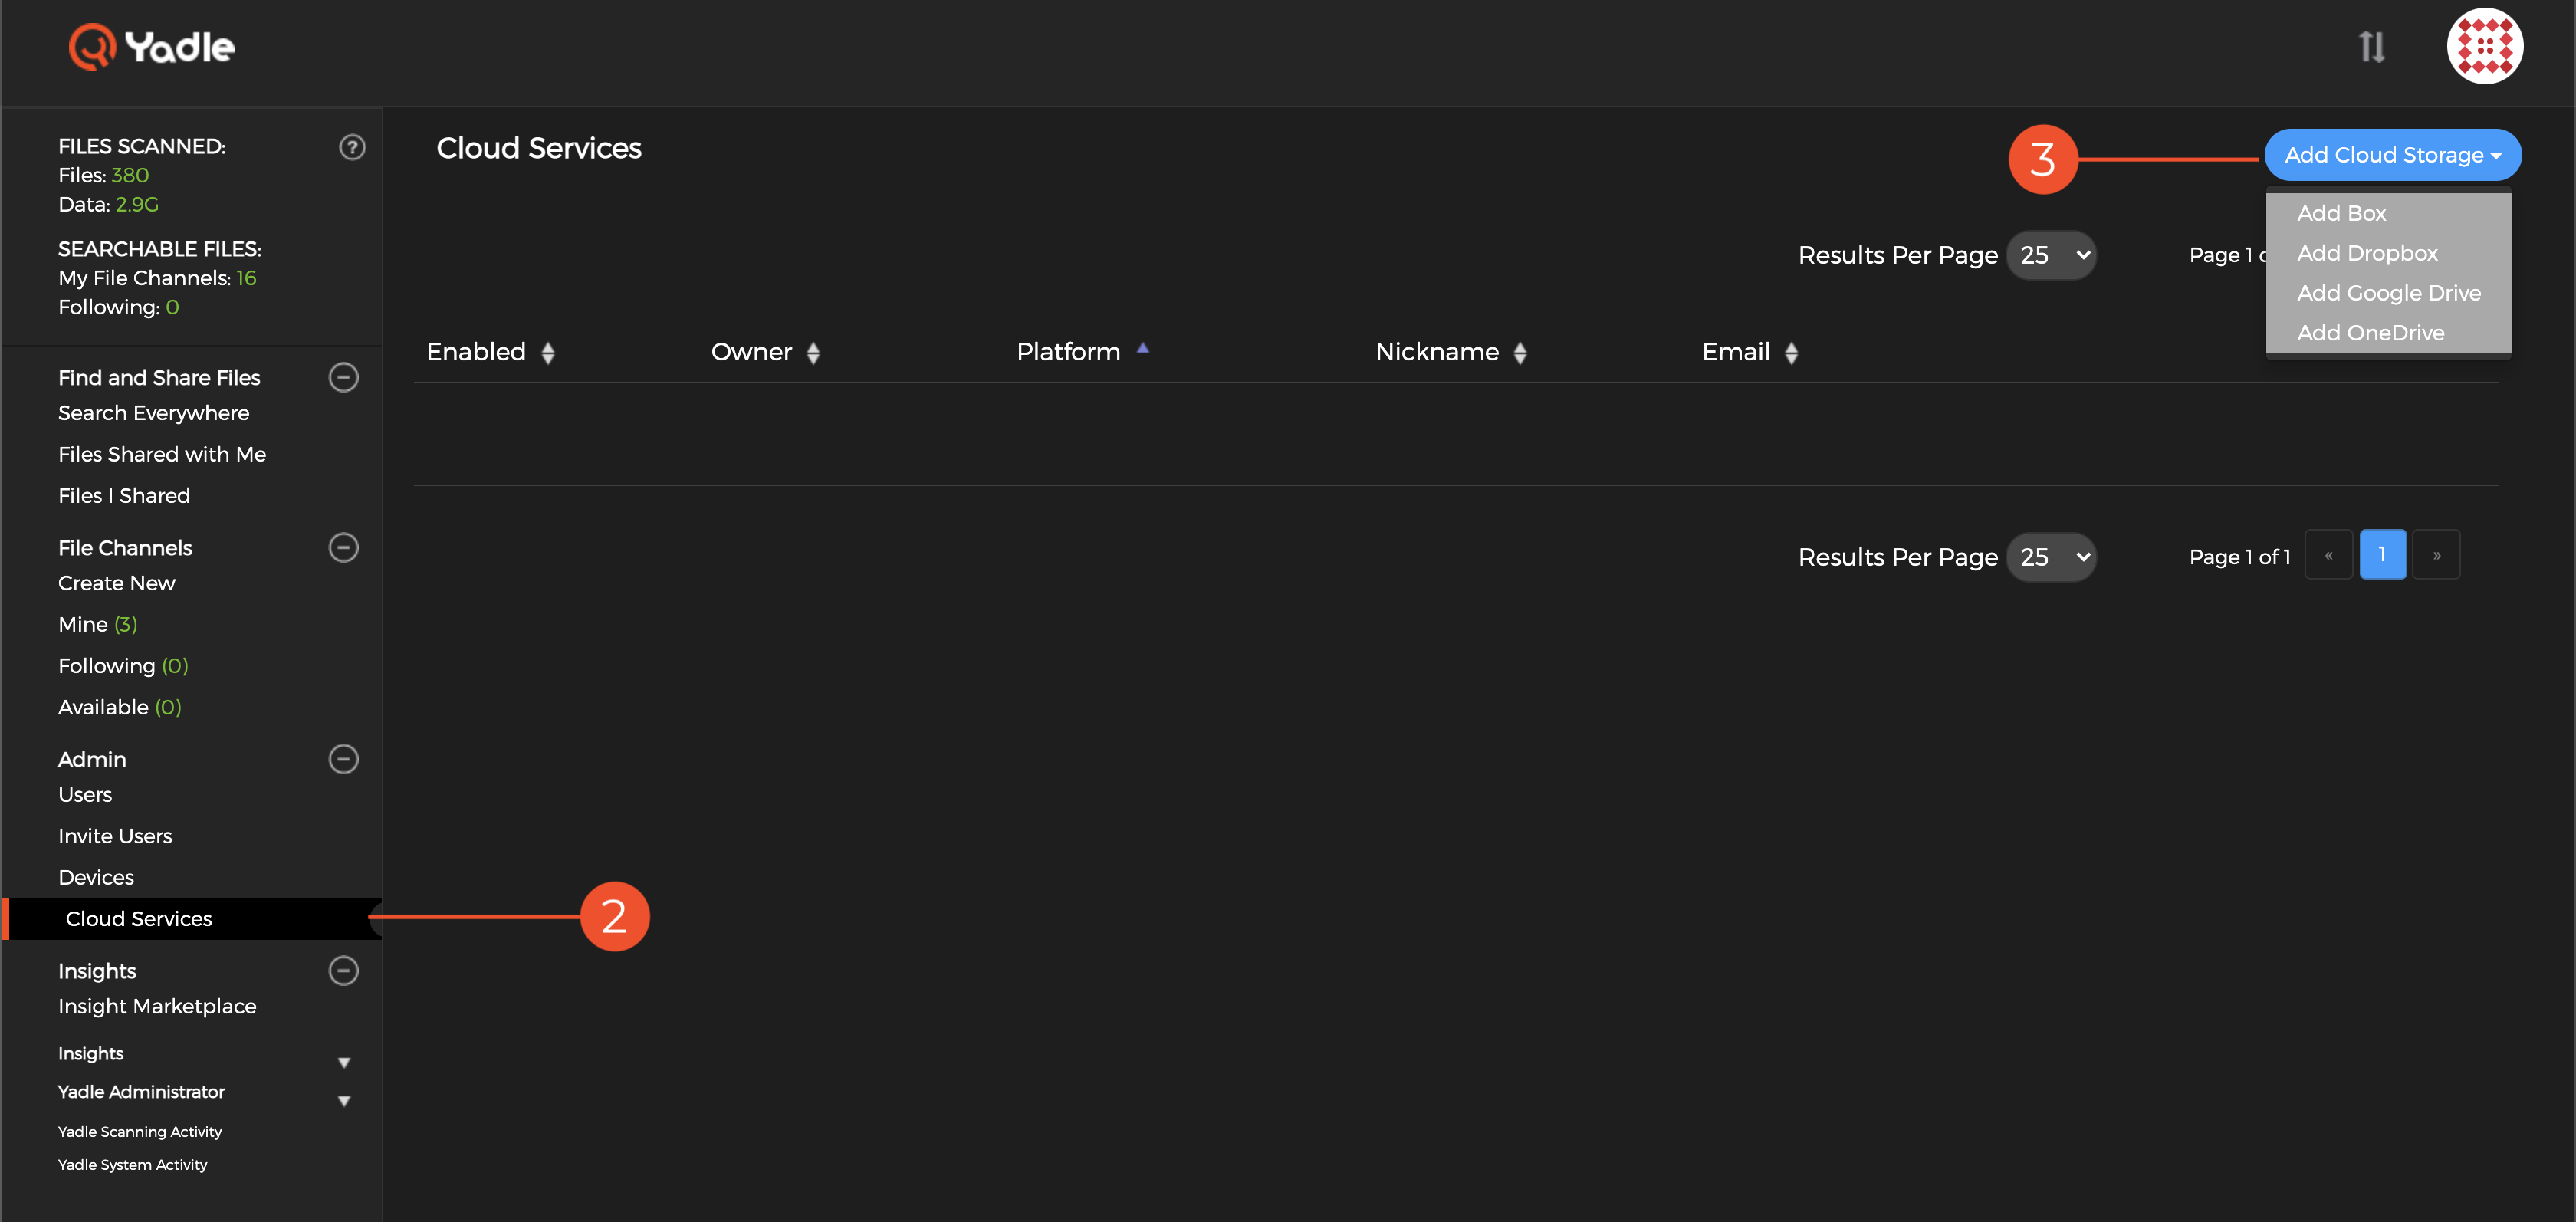
3. In the upper right corner of the page, click on Add Cloud Storage. A dropdown menu will appear. Select the cloud storage provider containing files you want to scan with Yadle. Click on Add Dropbox.
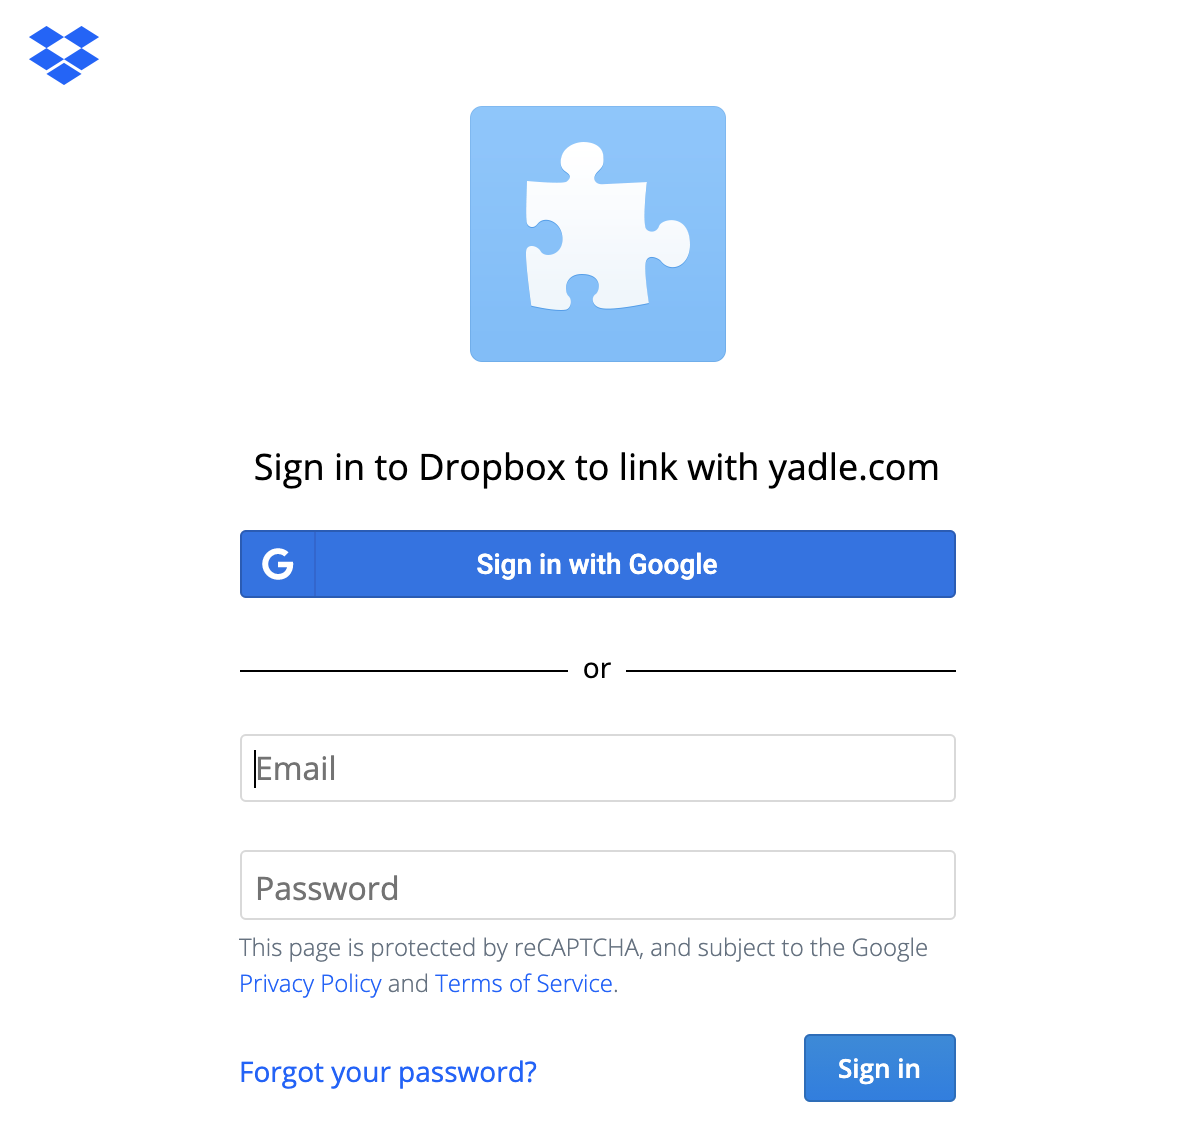
4. A new browser window will open asking you to provide your Dropbox credentials in order to link with Yadle. Enter your Dropbox email and password and click on Sign in.
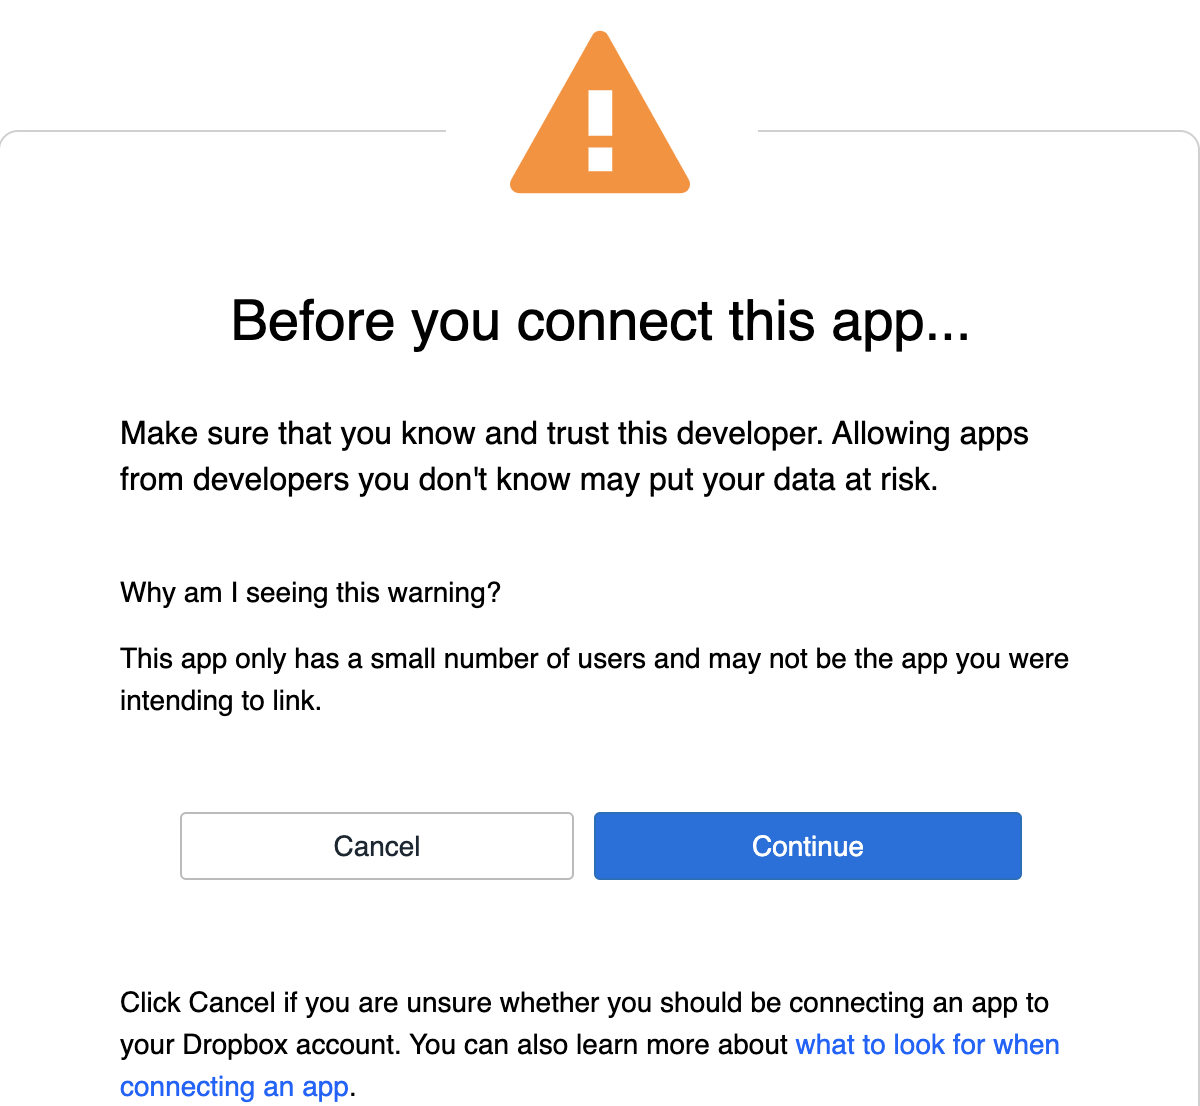
5. You will then be asked to trust the developer. Click on Continue.
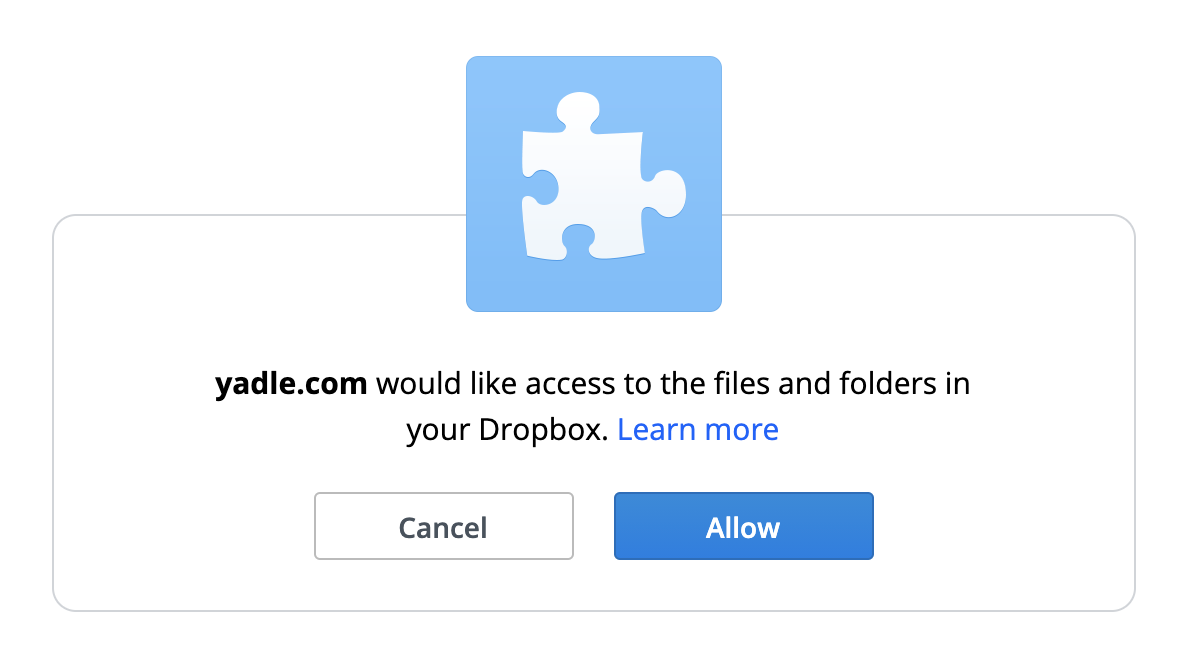
6. Finally, click on Allow to give Yadle access to files and folders in your Dropbox.
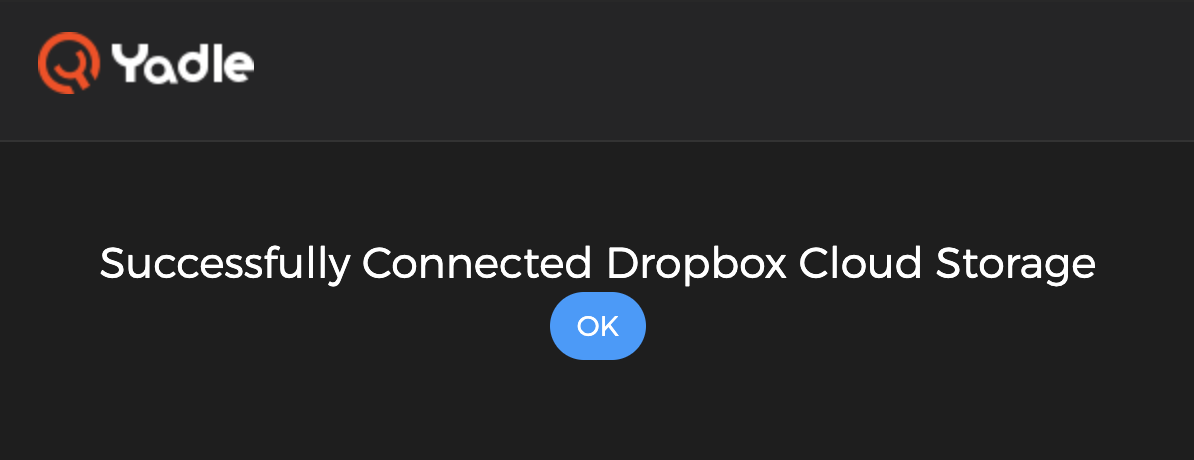
7. After successfully connecting your cloud storage, you’ll be presented with the following message. click on OK to return to Cloud Services page.
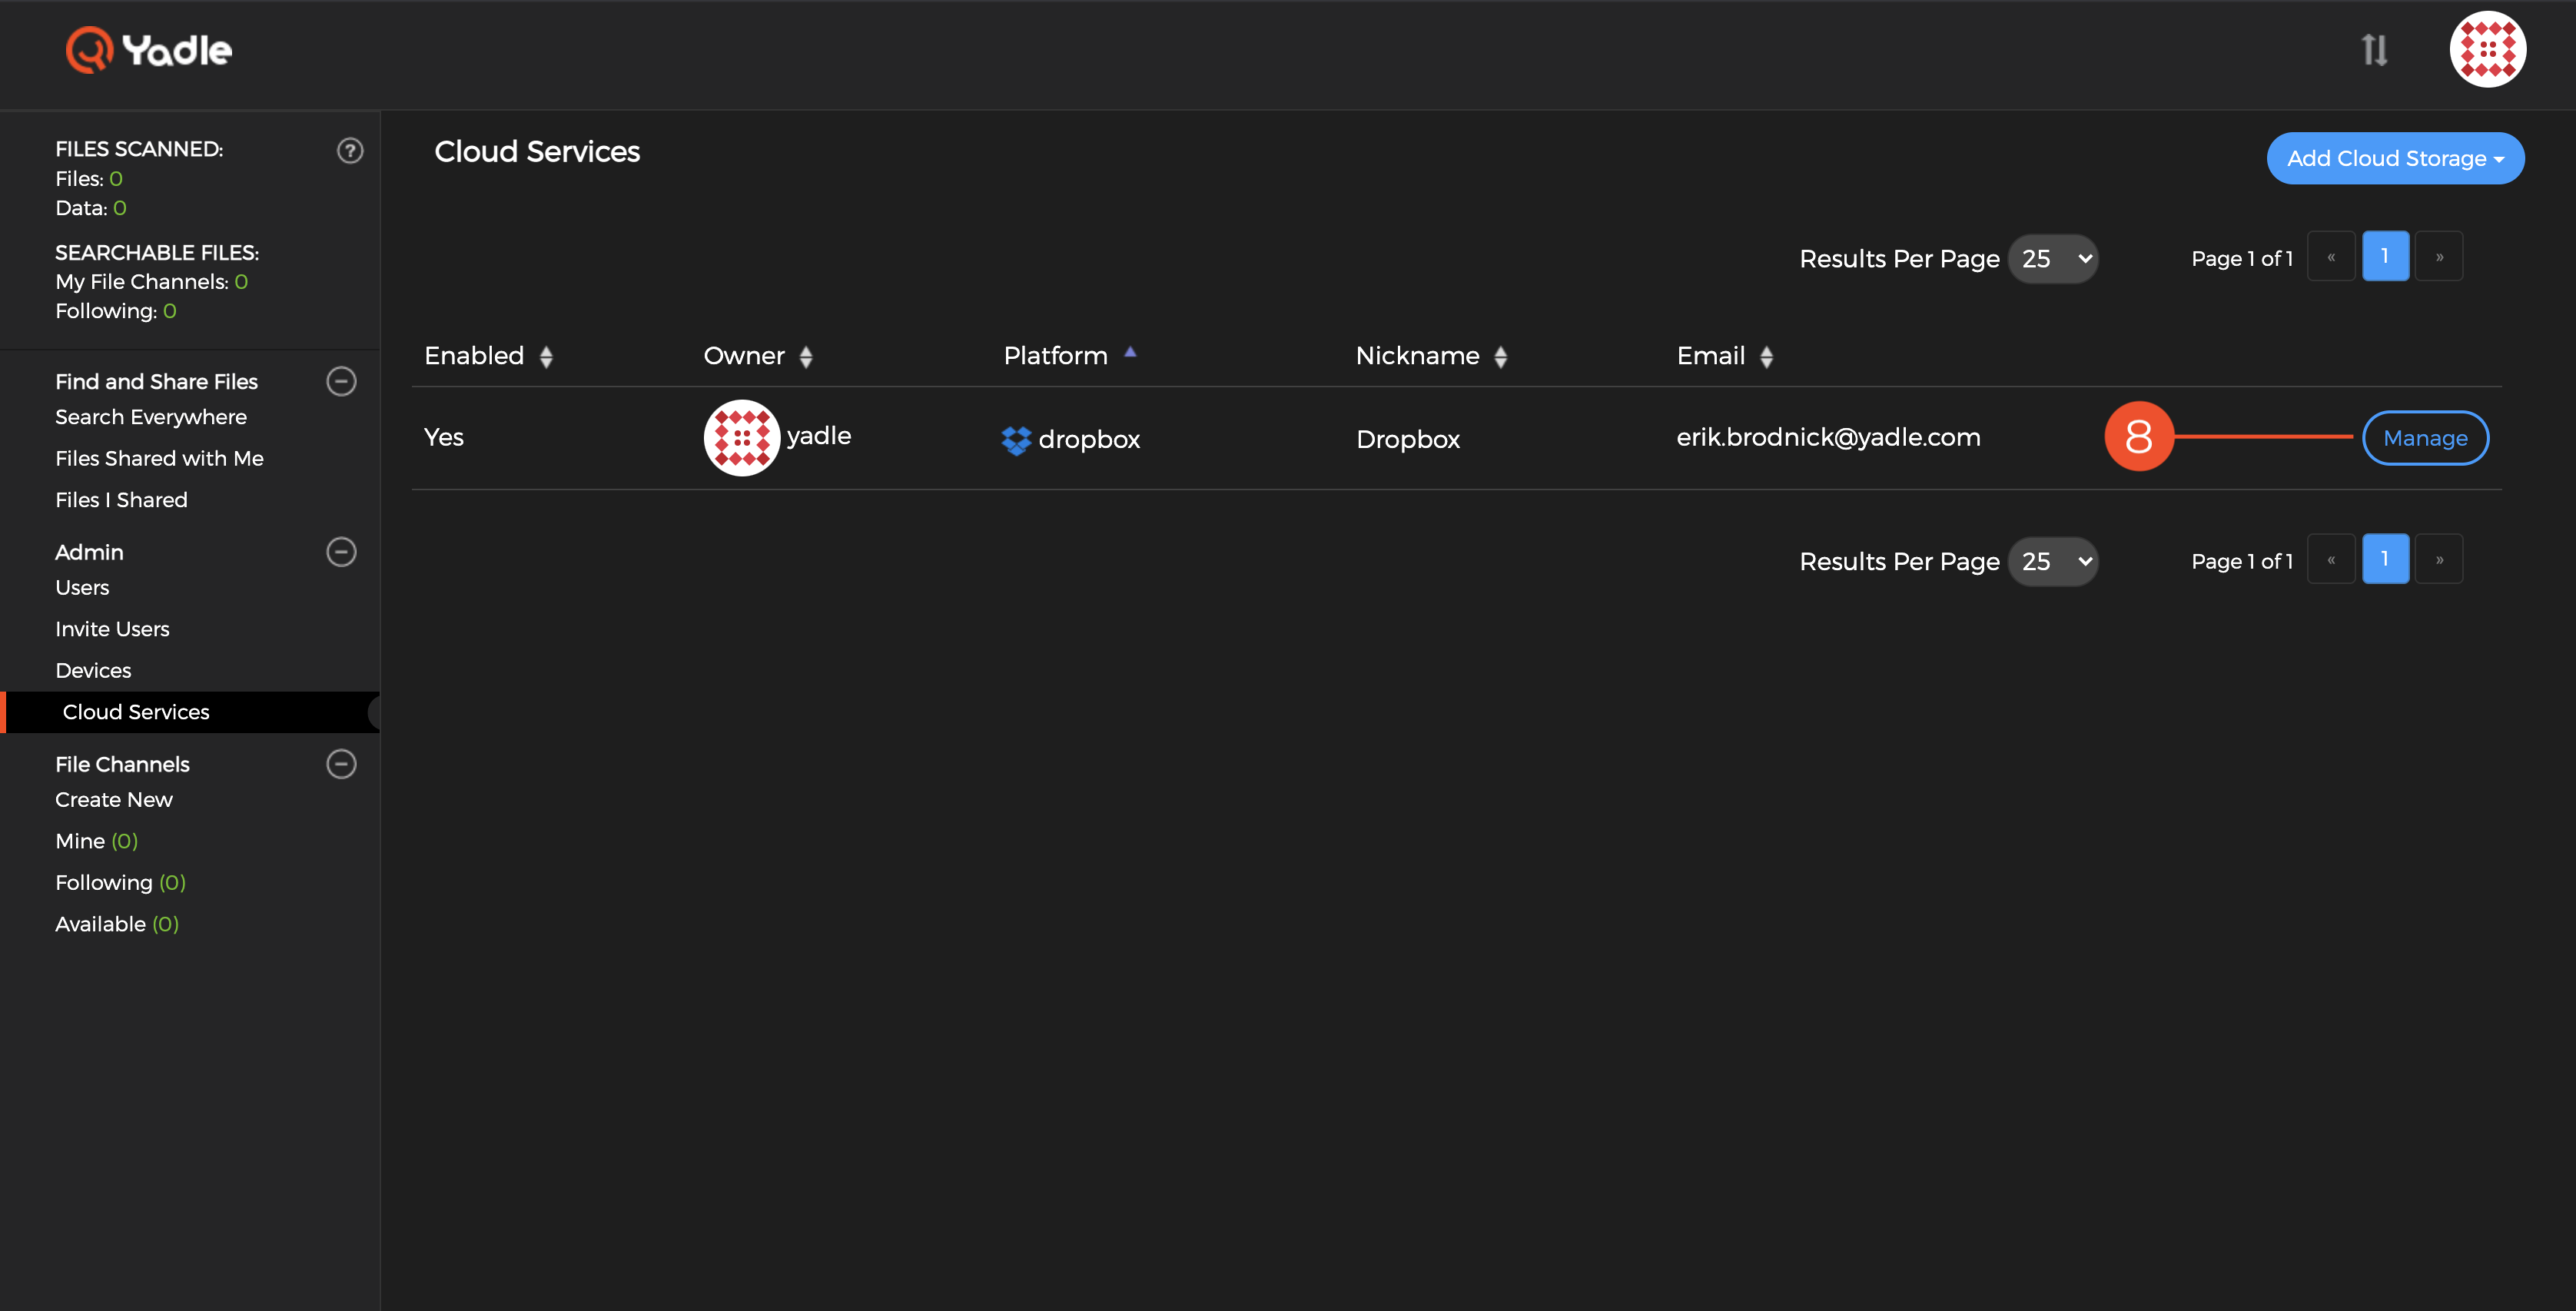
8. Your Dropbox account is now linked to Yadle. In order to begin scanning files in your Dropbox, you will need to set the scope for Yadle to know which folders you want to scan. Click on Manage next to your newly configured Dropbox cloud storage.
Note:
- The owner of the cloud service is the active Yadle user account when connecting to a cloud storage. Only the owner can Manage its cloud service. In this example, the “yadle” account was used to connect to this cloud storage. It is likely that your Yadle user account will be the owner of your own connected cloud storage.
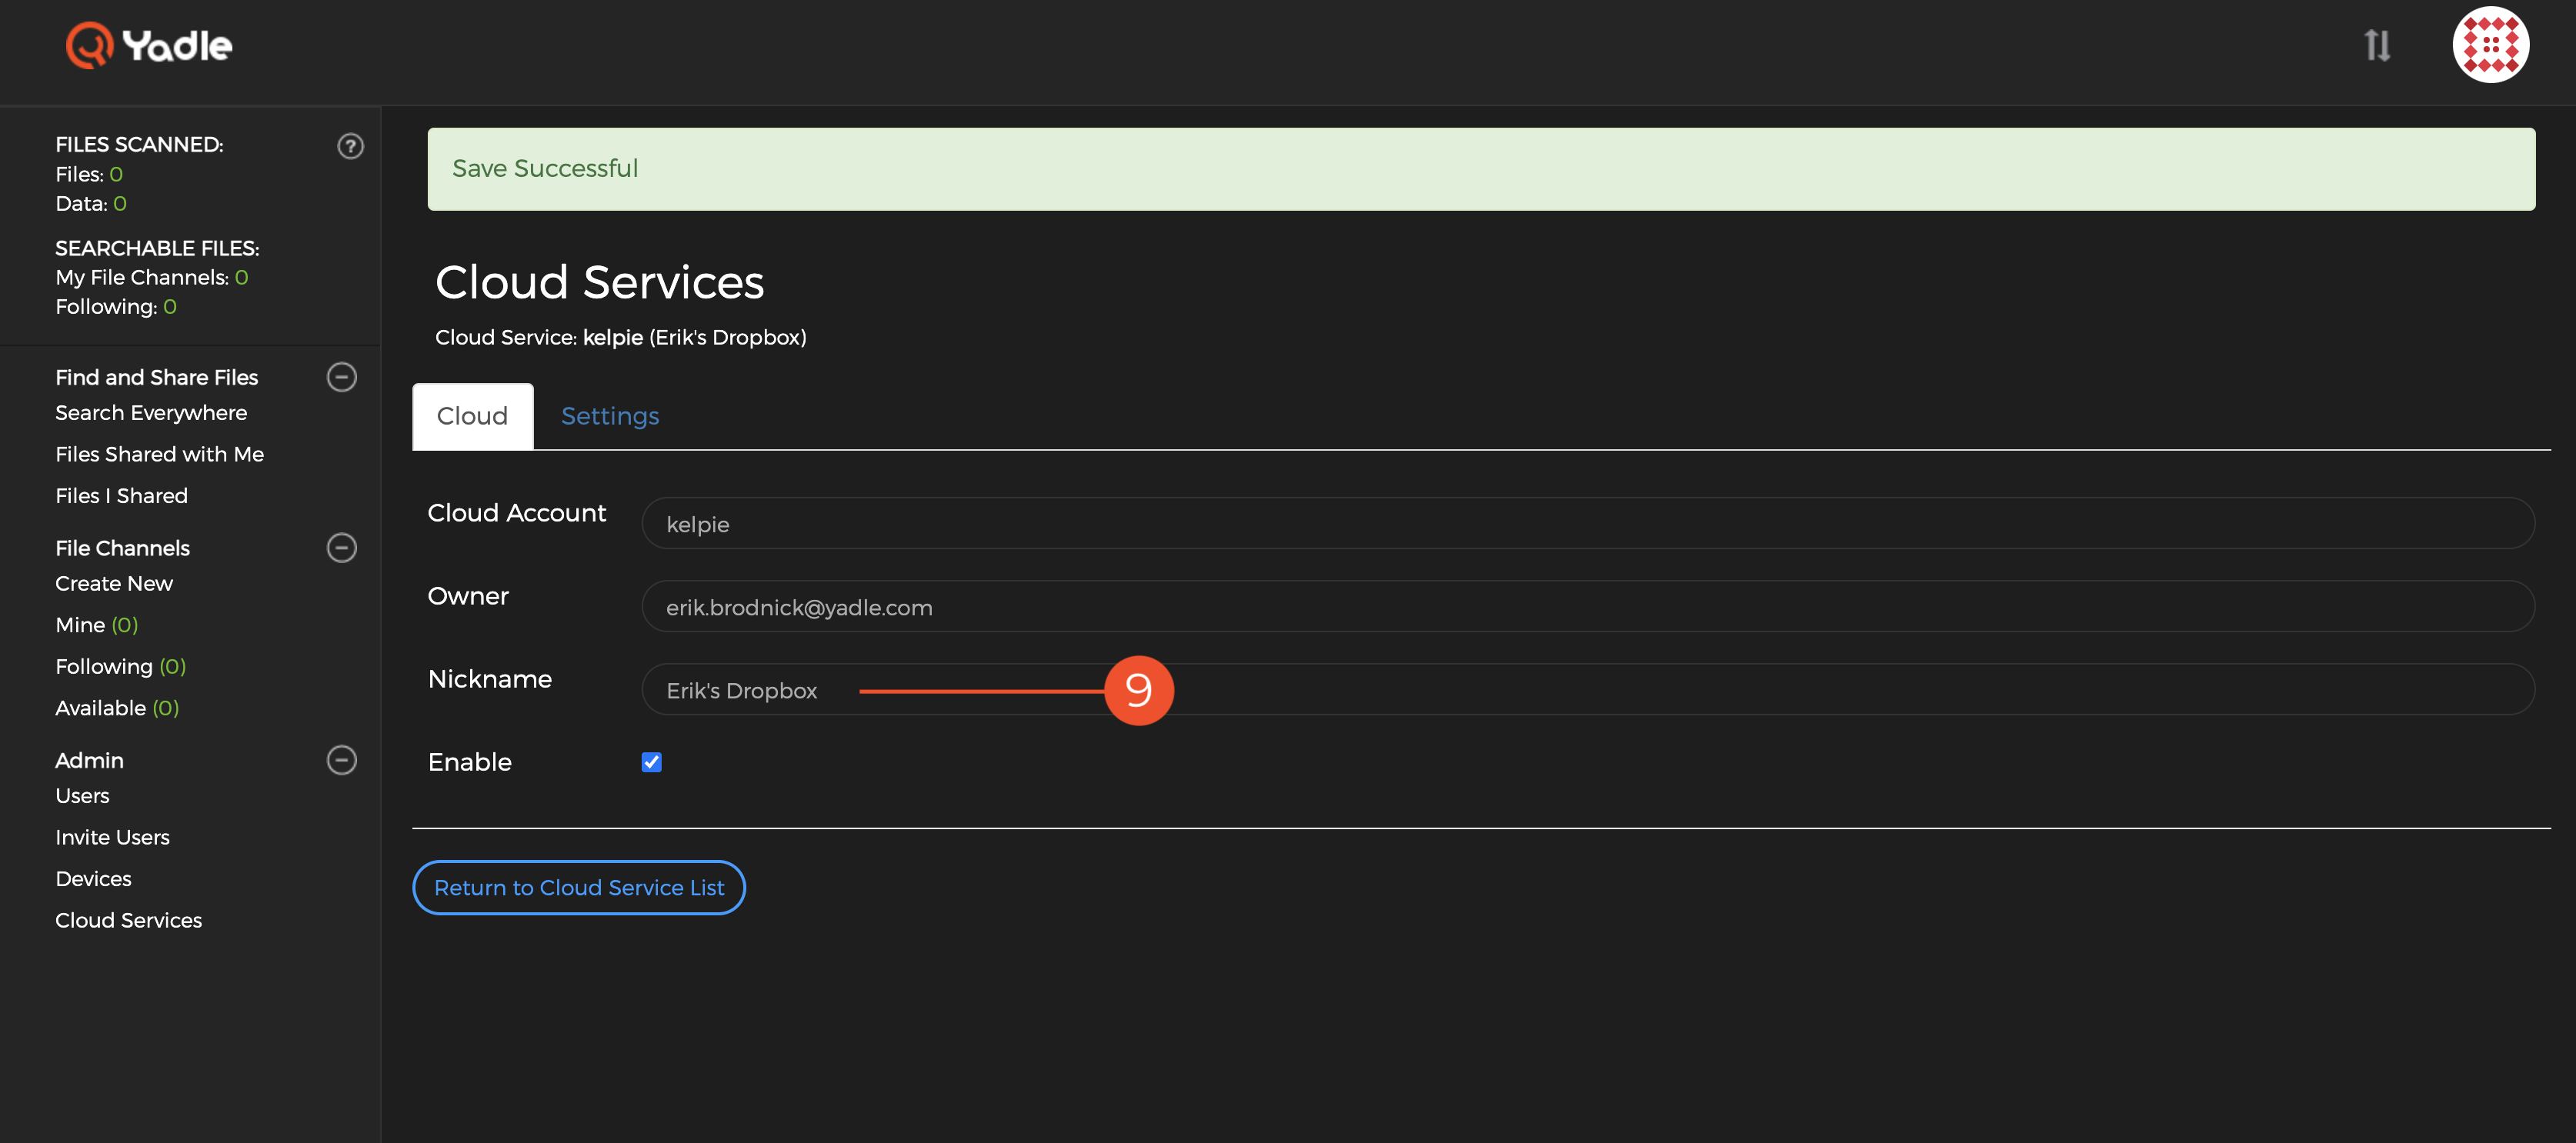
9. Edit the Nickname field for your cloud storage device. Give it a name you can easily recognize. This will be helpful in differentiating your cloud storage from others in later steps during File Channel creation.
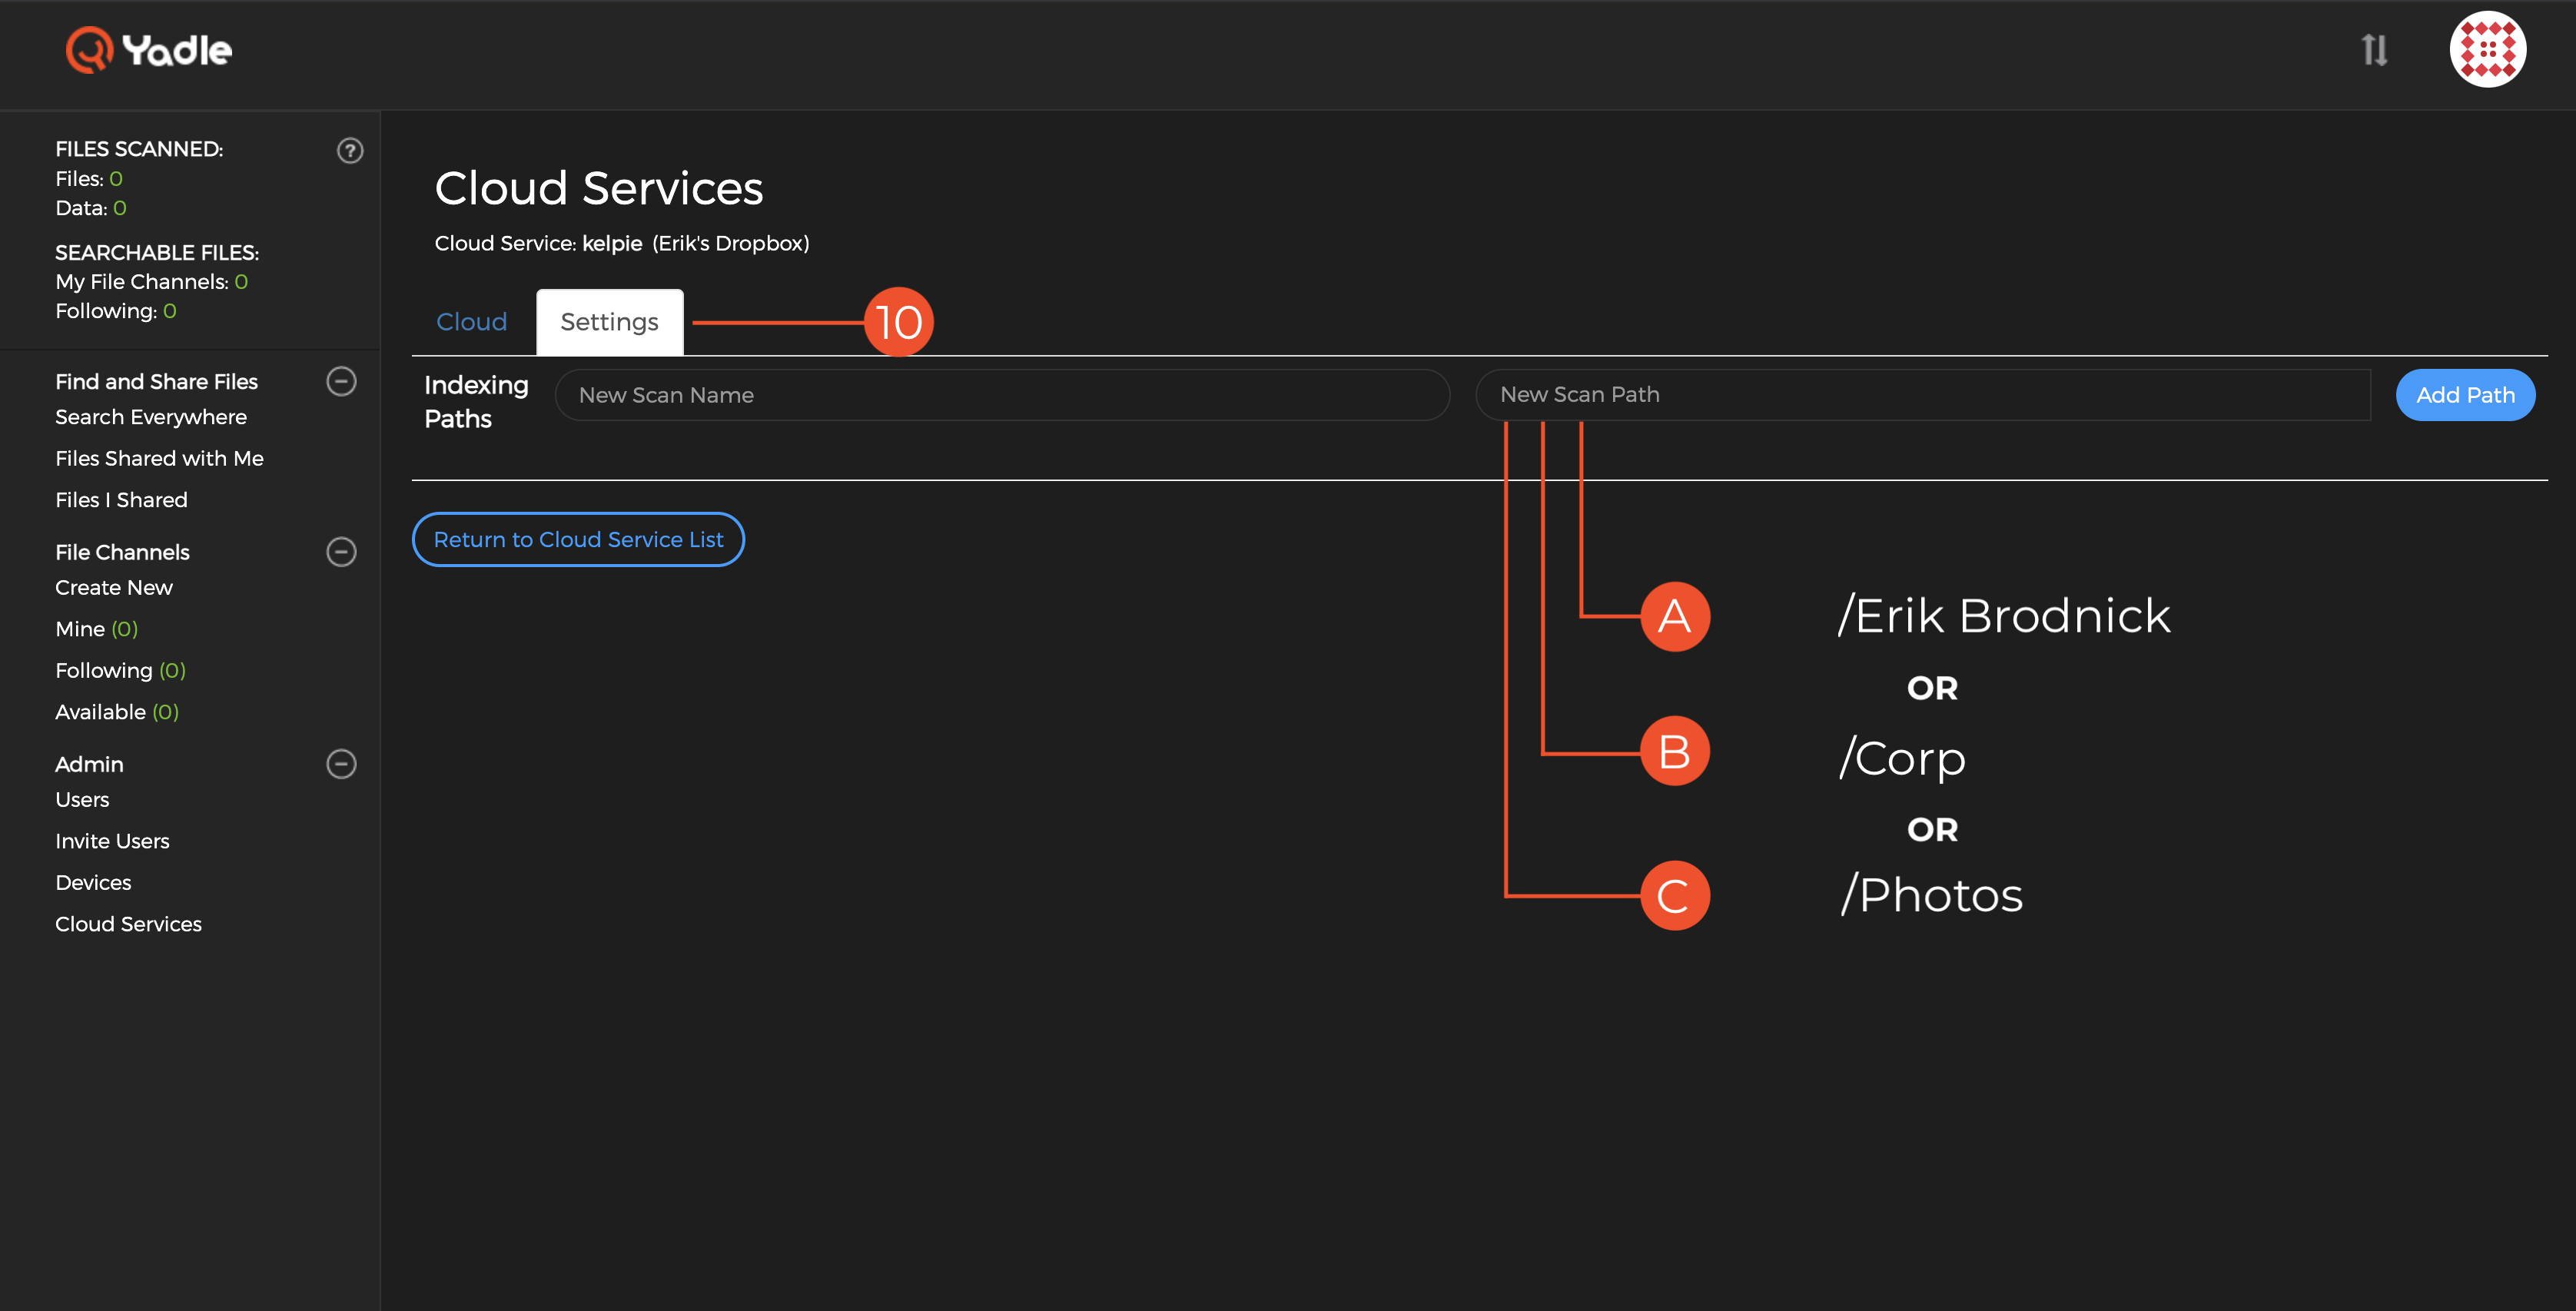
10. Click on the Settings tab. This is where you will specify the folders for Yadle to scan. First, type any identifying name in the “New Scan Name” field. Then specify the Scan Path accordingly.

Note:
- It is easy to include your entire Dropbox storage in the Yadle scope for scanning. To do this, simply use “/” as the Scan Path. Otherwise, to limit the scope of what Yadle will scan, set up multiple Scan Paths with explicit paths of Dropbox folders to include.
11. In order to perform searches against the Dropbox files that have been scanned, you must create a File Channel. Follow the guide here to create a File Channel. Be sure to select the correct cloud storage device from the dropdown when creating a File Channel. Look for the nickname that you gave to your connected cloud storage in Step 9 above.