

Setting up Yadle » Scanning Files » Add a Scan Path
It is possible to run one or multiple scanning processes. Running multiple scans allows you to more quickly add files to your Yadle catalog (See Increase Scanning Speed). If there is an overlap in your configured scan paths, the system will manage accordingly.
We recommend running a scan on your entire data root and creating scans pointing to more specific mount points for folders or drives that you want to scan more quickly. Yadle will process all configured scans on a parallel basis and handle the overlaps.
Step 1: Select Devices from left main menu.
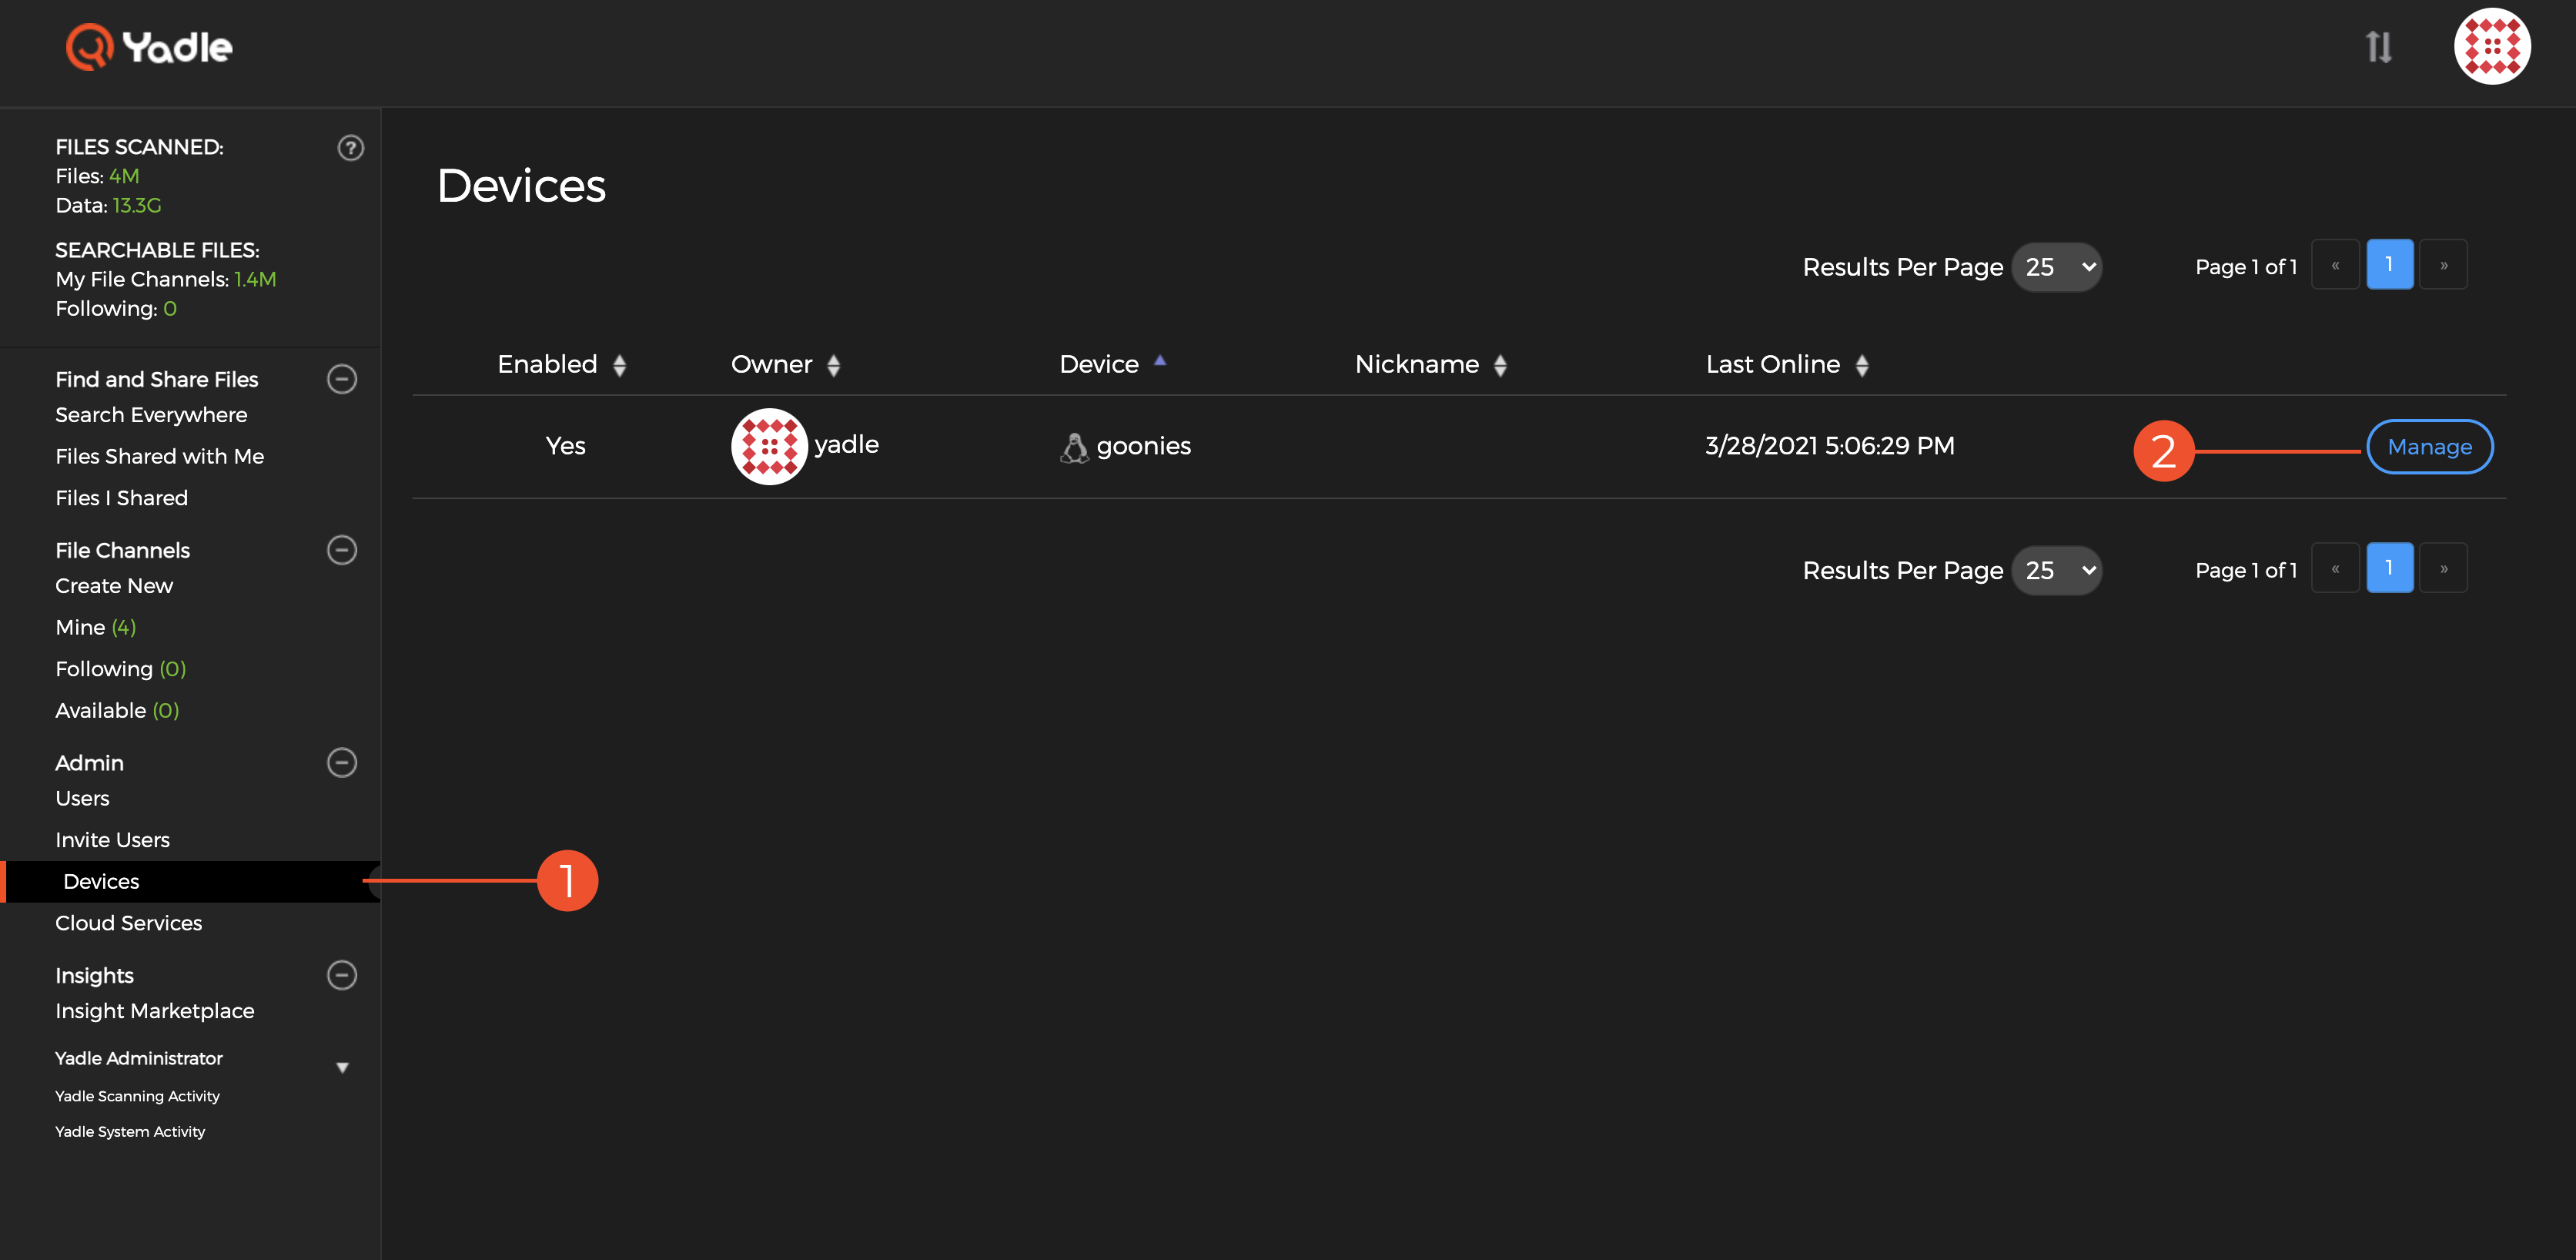
Step 2: Click on Manage on the far right for the agent device you want to add a Scan Path to.
Step 3: Once on the Device page, select on Settings tab.
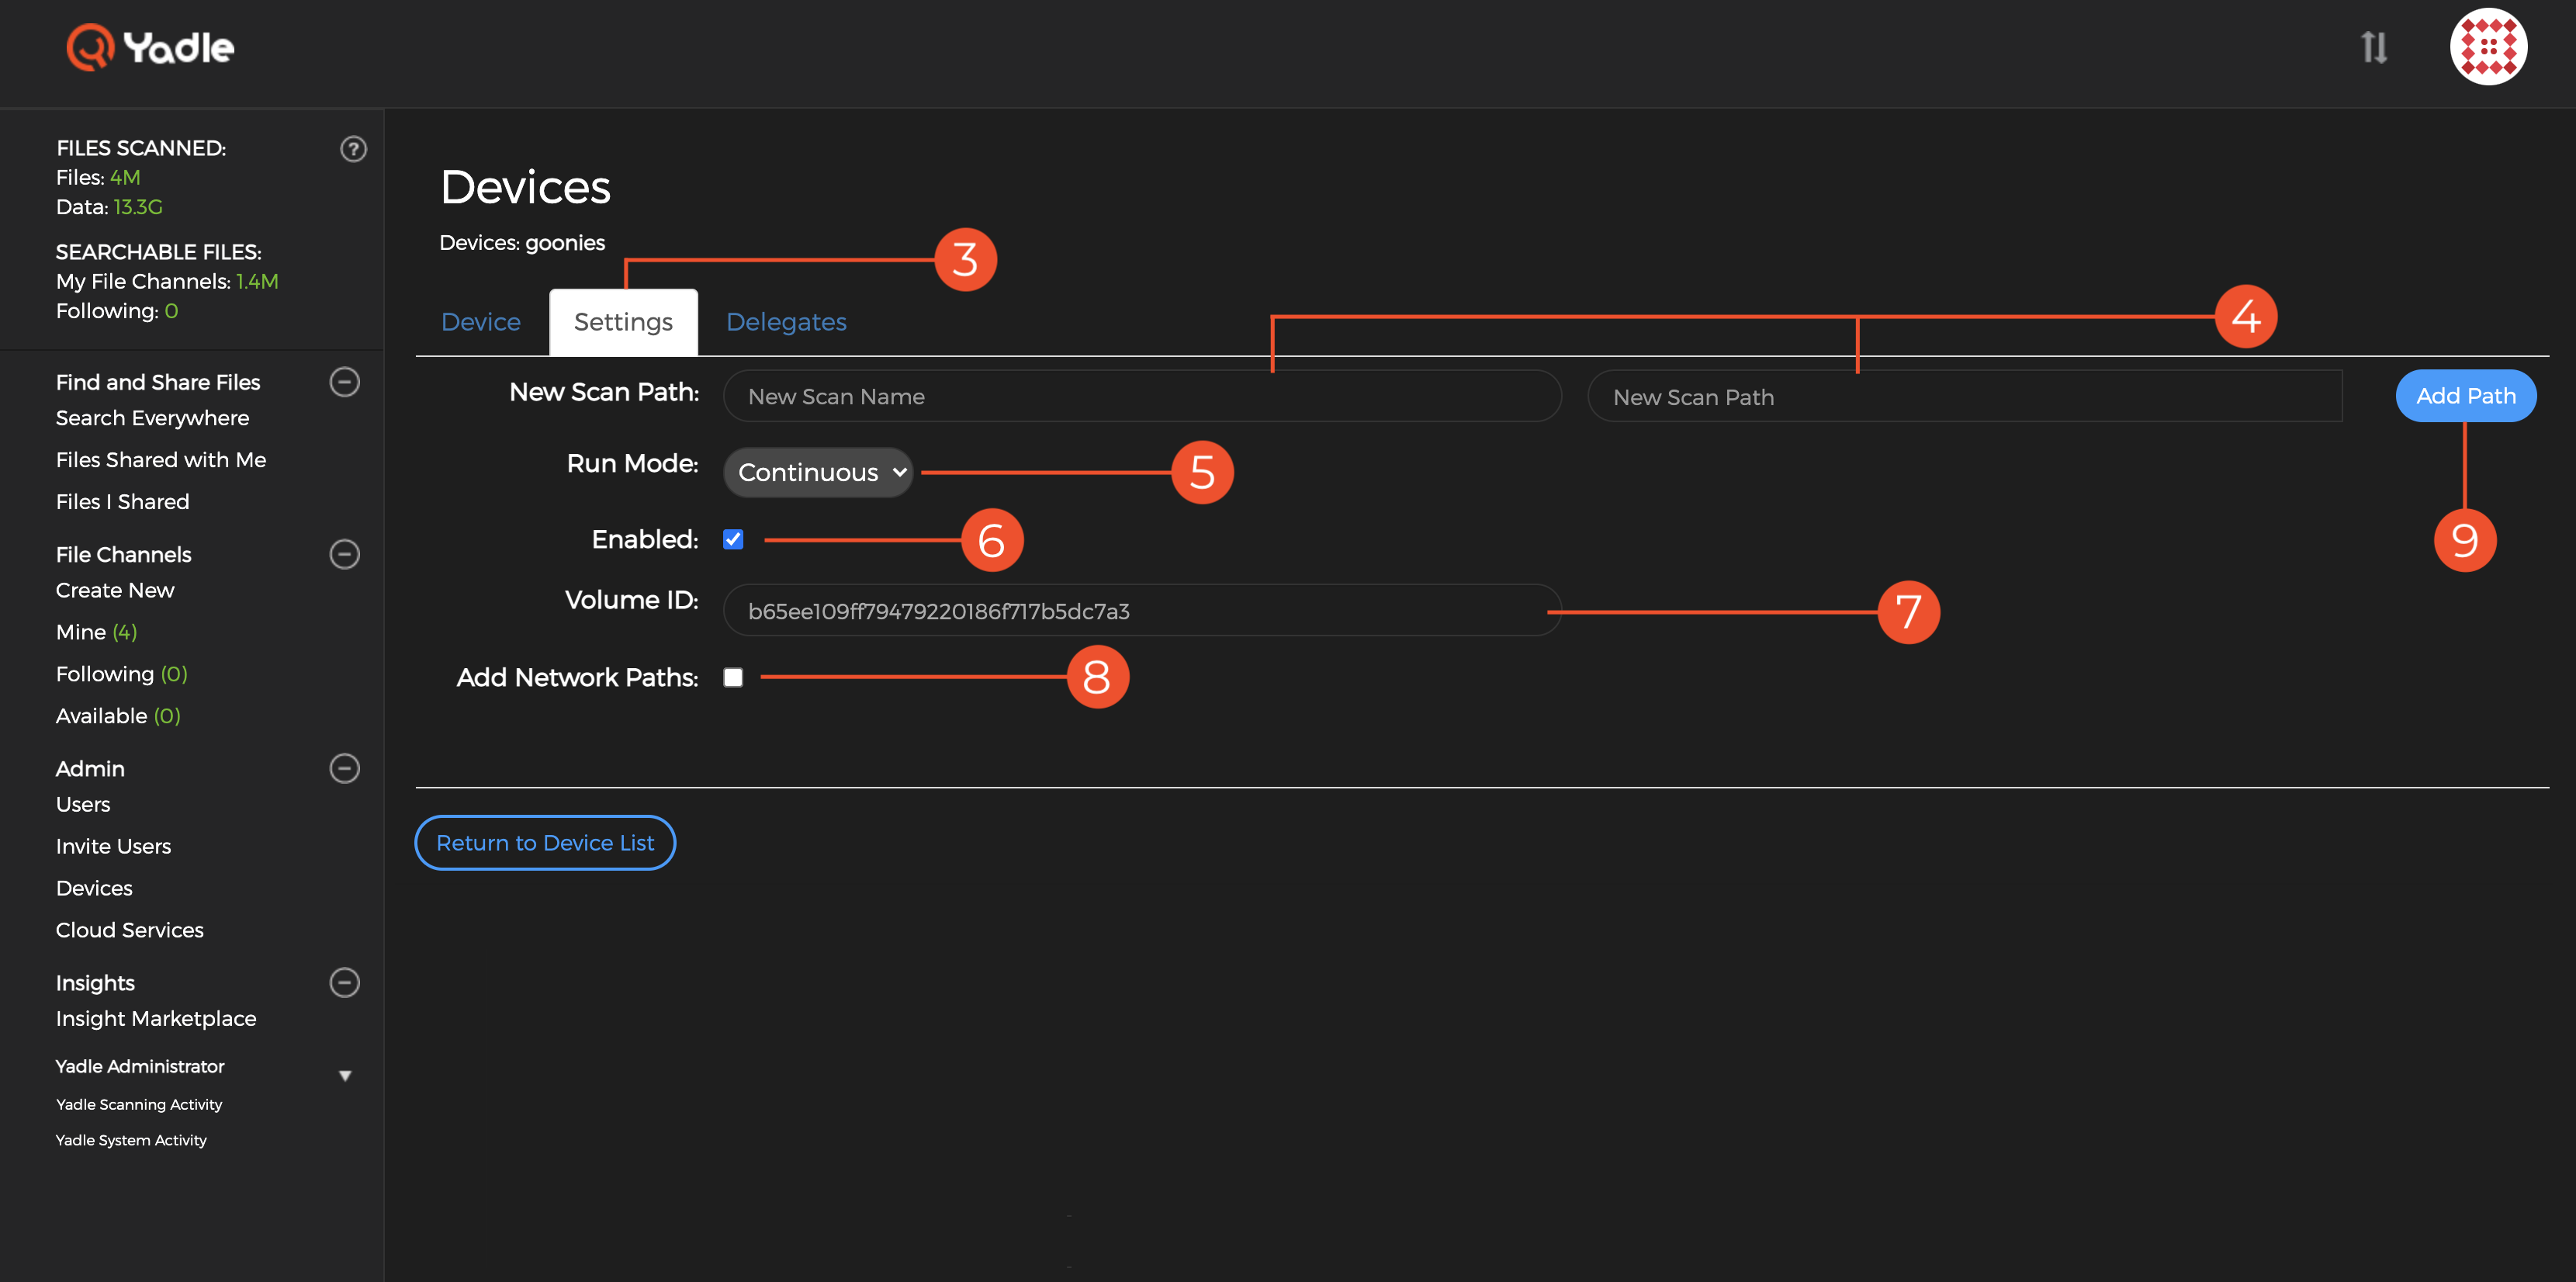
Step 4: Enter a name you for the scan in the New Scan Name field. Enter the full path of the folder to scan in the New Scan Path field.
Note:
- The Scan Path is the path from the perspective of the system running the Yadle agent.
- For NFS or SMB shares, the scan path may be different from how the same share is mounted on user workstations. For this scenario, you can configure Network Path Mapping as described in Step 8.
Step 5: Select a Run Mode. Choose Continuous if you want the Yadle agent to continually loop scans of the specified path. Choose Run Once to perform only a single scan.
Step 6: Select the box next to Enabled to turn on this Scan Path.
Step 7: By default the VolumeID field will be populated with a value based on the device. In most cases you do not need to change this. You may enter your own unique VolumeID. VolumeIDs are a mechanism to allow files to be associated with a physical volume or device in a portable manner. A common scenario is an external drive that gets plugged into multiple systems. Using VolumeIDs, Yadle agents would not re-scan the volumes as they move between systems.
Step 8: Setting up Network Path Mapping will translate the path that the Yadle agent sees to the appropriate path users access the same files on their computers. This is an optional step and can be added at any time. Selecting the checkbox next to Add Network Paths will reveal fields for Windows, macOS, and Linux path substitutions. Learn more about Network Mapping here.

Step 9: One completed, click on Add Path.